In this article we will try to understand what gRPC is in general and how to create tests using gRPC protocol. For a wide range of examples I decided to create tests using the following clients:
- Postman — It will be easy to understand to those who is not familiar with code
- Python — Today’s very popular scripting programming language. For the new generation who likes these anarchy languages:) Anyway, it was a good practice to me
Potentially it could be other programming languages, but I decided to stop on these. No more intro. Let’s jump to gRPC world…
What is gRPC?
According to Wikipedia, gRPC is high-performance and open source remote procedure call (RPC). And it was initially designed by Google.
Ok, let’s make it more simpler. It is about calling function/method on remote server in order to perform some operation. Let’s consider a concreate example:
You want to create a new user.
On server we have implemented specific function/method that can be called.
We use our client in order to send a request to the server and receive a response (successful or not).
Now, I have a feeling I was explaining basics of the Client-Server architecture:) The idea is you actually calling a functions implemented on server.
 |
How actually communication is happening?
By default, GRPC uses protocol buffers. I would call it as the contracts. What does it mean? It means, server and any client will use the same schema for the communication. The cool thing is that Protocol Buffers are a language-neutral, platform-neutral extensible mechanism for serializing structured data.
- This schema should be defined inside of the file text with “.proto” extension.
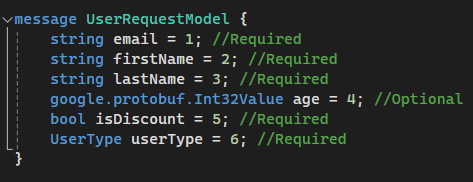
— First building block of this file is a “message”. Think about it as a model with a the fields we want to send or receive. Field structure is
a) Datatype. Data type expected to be send or received. As an example it might be a string, bool, number. Please read more about datatypes.
b) Field name. Name of the field you are planning to send
c) Order number. Like 1, 2, 3, …n
- Second is basically our service with rpc function signatures. Messages are used inside of these functions as input and output parameters grpc service expects us to send and we expect it response returned to us
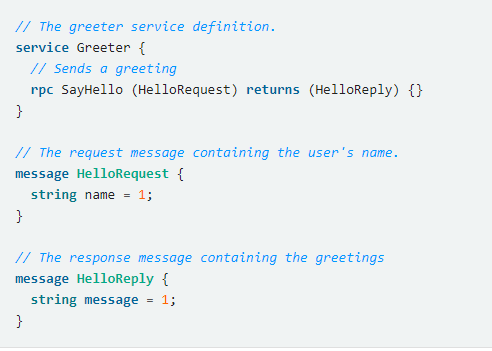
Then, once you’ve specified your data structures, you use the protocol buffer compiler protoc to generate data access classes in your preferred language(s) from your proto definition. Once you perform request, it automatically converts it to bytes and sends it to the server. Server returns you response based on the implemented logic. From testing prospective you act as usually. You may call a method with the different parameters and server should react based on your requirements and implemented logic. Enough theory:) Let’s go to the practice.
Test server
For simplicity, I’m providing a simple server that emulates User Management system. It is sounds very lought. It contains only a three methods:)
CreateUser — Creates a user and returns it
GetUsers — Gets all users
GetUsersAsArray — Gets all users and return it in array.
What we want to do is to run this server before starting creating the tests
Pre-requisites
- Download GitHub project
- Follow the readme instruction in order to run the server. It is easy steps

Proto file
Proto file can be found inside of the GrpcServer →Protos folder
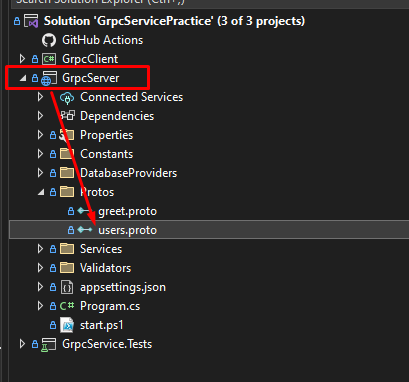
You will use this file in other clients. So, you may want to copy it or remember it is location
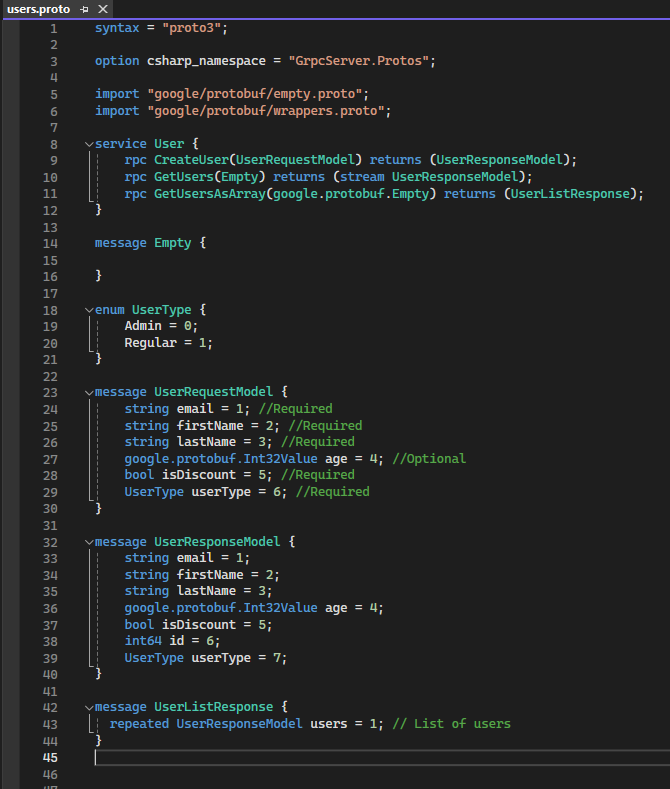
Once you have done with a server we could jump into the testing. Will start from simple ones using Postman
GRPC tests using Postman
Finally we came to the most interesting. We are going to send the requests and create the tests. At least one:)
Test creation
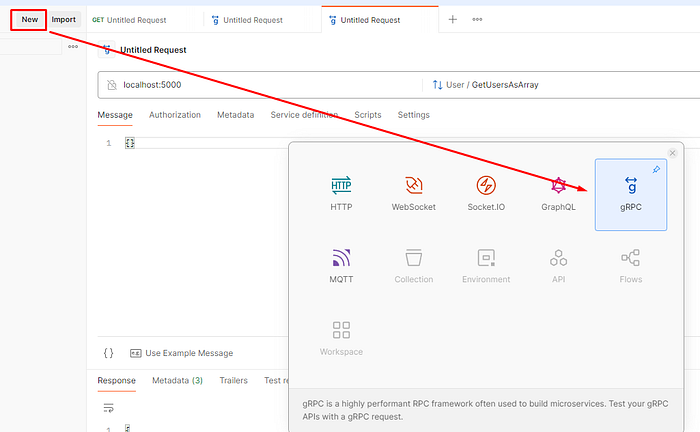
- In Postman, we could initiate a new requests and select “gRPC”. As easy as that.
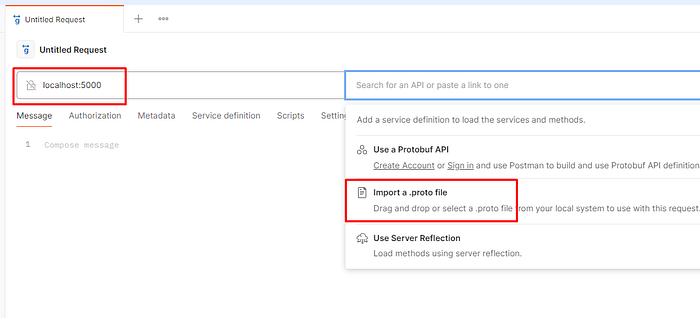
- Next, we want to specify server URL and import .proto file.
Note: There are other options how to communicate with .proto file. But at this stage we want to simplify it.
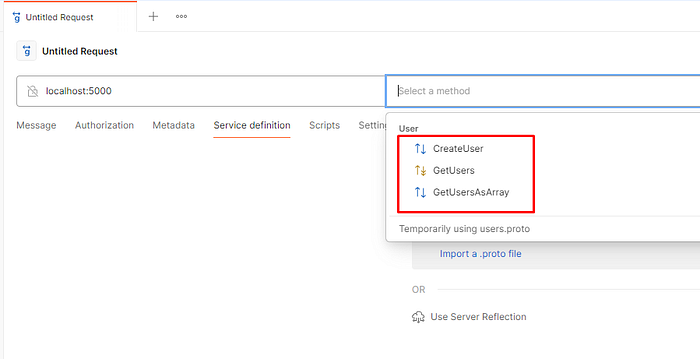
- Once file imported, you may already see available requests in “Select method” section
- Let’s try to create a request for user creation. Once method is selected, we need to prepare a message. Postman already contains a very useful button for example generation — “Use Example message”. You can change the values if you don’t like something.
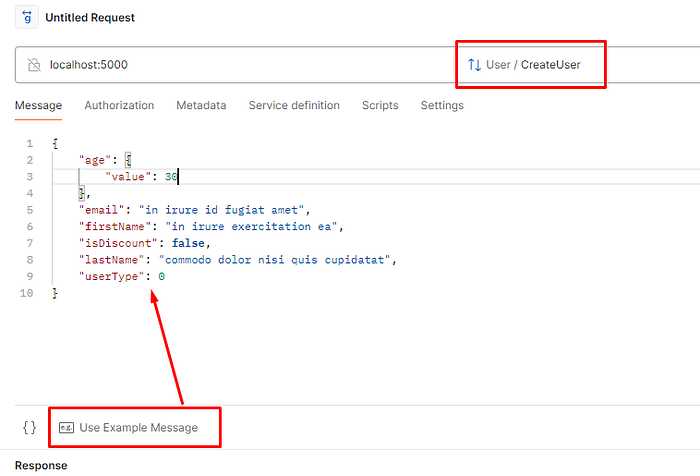
Note: In this article we will play only with “CreateUser” method, but you may try other methods. It should also work.
- Finally we could use invoke and new created user will be returned to us.

- Let’s make a simple test from the request. Let’s go to the Scripts and use a snipped for status code verification. In real life, it is not enough, but we are considering concept
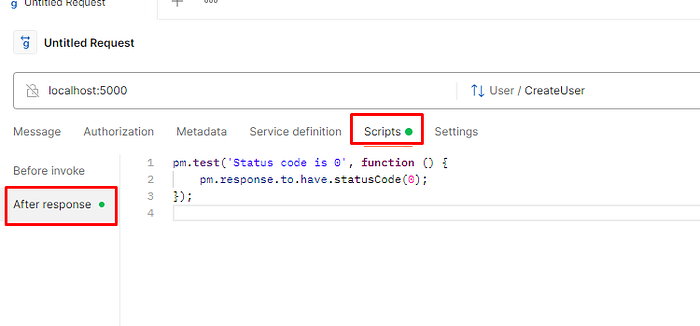
- Once you will run your test again, you will see the result.
Next steps
In the example above we have considered only simple scenario with very primitive verification step. As for the next steps you may consider the following
- Add more assertions steps. Only status code verification is not enough
- Add another cases. We considered only one positive scenario. Use test design techniques to add more scenarios
- Try to run it from CLI in order to run them Continues Integration. Use Postman CLI or Newman (This step is not related to our topic, but it is always nice to remember about it)
GRPC tests using python client
As before, we will divide it into project preparation and test design sections.
Project preparation
I’m going to use Pipenv. So, project setup will looks like this
- Install python if you haven’t already done it
- Install pipenv
pip install --upgrade pip
pip install pipenv
3. Create a project directory
mkdir my_grpc_project
cd my_grpc_project
4. Initialize your Pipenv environment with Python version you have installed
pipenv --python 3.8.25. Activate the Pipenv shell
pipenv shell6. Install GRPC related packages (grpc client)
pipenv install grpcio grpcio-tools7. Install test related packages
pipenv install pytest pytest-asyncio --dev8. Pip file should be created. It should looks similarly to the following
[[source]]
url = "https://pypi.org/simple"
verify_ssl = true
name = "pypi"

[packages]
grpcio = "*"
grpcio-tools = "*"

[dev-packages]
pytest = "*"
pytest-asyncio = "*"

[requires]
python_version = "3.8"
python_full_version = "3.8.2"
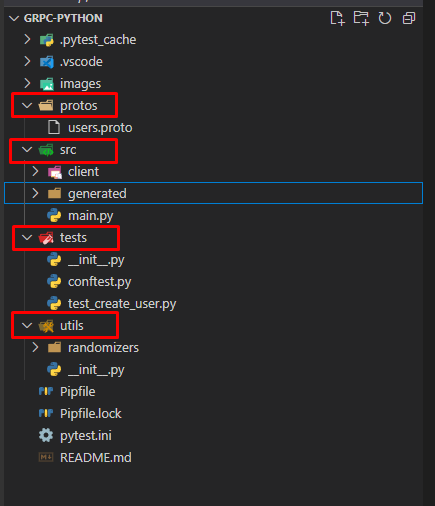
9. Define project structure. As an example:
“protos” — The folder where we will put .proto files
“src” — All client code will be inside
“tests” — Folder with the tests
“utils” — Different test helpers
Generate Python GRPC files and create a client
- To generate Python gRPC files from a .proto file, you can use the
protoccompiler with the gRPC plugin for Python. Here are the command you may use in order to generate it
python -m grpc_tools.protoc -I./protos --python_out=./src/generated --grpc_python_out=./src/generated ./protos/users.protoThis command will generate GRPC client files inside of the “src/generated” folder
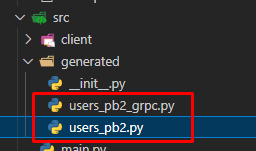
- Next we are going to create a very simple client
- Let’s create a file “grpc_client.py”
- Let’s put a simple implementation inside
import grpc
import os
import sys

# Assuming the grpc_client.py is in src/client and the generated files are in src/generated
generated_files_directory = os.path.abspath(os.path.join(os.path.dirname(__file__), '..', 'generated'))
if generated_files_directory not in sys.path:
    sys.path.append(generated_files_directory)

from users_pb2_grpc import UserStub

async def create_grpc_channel(address='localhost:5000'):
    """Create and return a gRPC channel."""
    return grpc.aio.insecure_channel(address)

def get_user_client(channel):
    """Create and return a user service client."""
    return UserStub(channel)
- It is time to create tests

Test design
- First, we will create a test configuration file where we will define a channel and user client
import sys
import os
import pytest
base_directory = os.path.abspath(os.path.join(os.path.dirname(__file__), '..'))
client_directory = os.path.join(base_directory, 'src', 'client')
generated_directory = os.path.join(base_directory, 'src', 'generated')

sys.path.append(client_directory)
sys.path.append(generated_directory)
from grpc_client import create_grpc_channel, get_user_client


@pytest.fixture(scope="function")
async def grpc_test_client():
    # Create the channel
    channel = await create_grpc_channel('localhost:5000') # I'm lazy, so I'm hardcoding the port for this example. It should be read from a config file

    # Create the client
    client = get_user_client(channel)

    # Provide the client to the test and ensure it is awaited properly
    try:
        yield client
    finally:
        # Close the channel after the test
        await channel.close()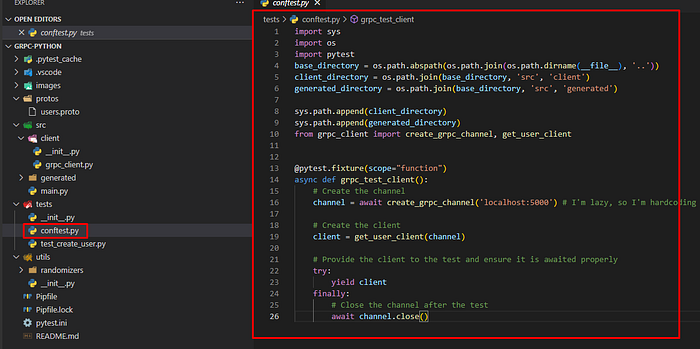
2. Finally we can create the tests.
I will add positive and negative case examples
import pytest
from users_pb2 import UserRequestModel
from google.protobuf.wrappers_pb2 import Int32Value
from utils.randomizers.random_string import generate_random_string
from grpc import StatusCode, RpcError

@pytest.mark.asyncio
async def test_create_user_with_full_valid_data_should_be_created(grpc_test_client):
    # Arrange
    user_client = grpc_test_client

    request_model = UserRequestModel(
        email="john@example.com",
        firstName="John",
        lastName="Doe",
        age=Int32Value(value=30),
        isDiscount=True,
        userType=1
    )

    # Act
    response = await user_client.CreateUser(request_model)

    # Assert
    assert response is not None
    assert response.email == "john@example.com"
    assert response.firstName == "John"
    assert response.lastName == "Doe"
    assert response.age.value == 30
    assert response.isDiscount is True
    assert response.id > 0


@pytest.mark.asyncio
@pytest.mark.parametrize("chars_number, is_positive", [
    (3, True),
    (2, False),
    (100, True),
    (101, False)
])
async def test_create_user_last_name_validation(grpc_test_client, chars_number, is_positive):
    # Arrange
    user_client = grpc_test_client
    request_model = UserRequestModel(
        email="test@test.com",
        firstName="FirstName",
        lastName=generate_random_string(chars_number)
    )

    # Act and Assert
    if is_positive:
        # Expect no exception, and user creation should be successful.
        response = await user_client.CreateUser(request_model)
        assert response is not None  # Ensure some response logic if needed
    else:
        # Expect an exception due to invalid last name length.
        with pytest.raises(RpcError) as exc_info:
            await user_client.CreateUser(request_model)

        assert exc_info.value.code() == StatusCode.INVALID_ARGUMENT
        if chars_number == 101:
            expected_message = "Last name max length is 100"
        else:
            expected_message = "Last name min length is 3"

        assert expected_message in exc_info.value.details()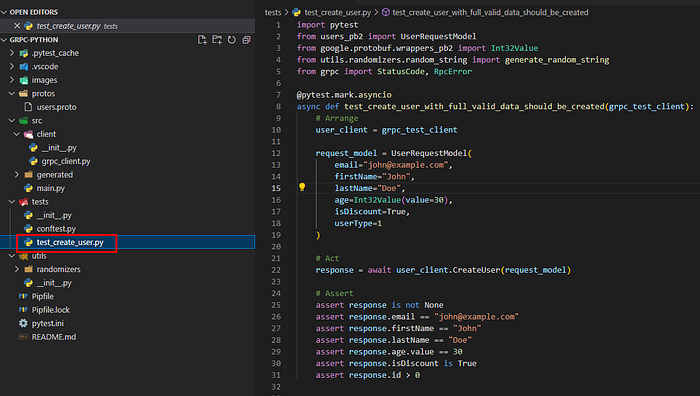
Note: I know this is lazy code. I just want to share you a basic idea
3. And of course let’s run our tests
- Activate virtual environment with the following command:
pipenv shell- Run the tests with a command:
pytest

No comments:
Post a Comment